Average Loft Conversion Cost in New Zealand (2025): Prices, Factors, and Budget Guide
Here’s the straight answer you came for: the average cost of a loft conversion in New Zealand in 2025 ranges from about NZ$50,000-$90,000 for a basic roof‑light conversion, NZ$120,000-$220,000 for a typical dormer with an ensuite in Auckland, and NZ$200,000-$400,000+ for complex roof lifts or mansard-style builds. Where you land depends on structure, roof shape, head height, plumbing, and code upgrades. Expect 4-7 months end-to-end including design, consenting, and build.
- Typical per‑m² cost for a habitable loft conversion: NZ$2,800-$5,500+ in Auckland, higher at the tricky end.
- Biggest cost drivers: head height/roof shape, structural work, dormers, bathroom plumbing, windows, and insulation under H1 energy rules.
- Soft costs (design, engineering, council) often run 10-15% of build; add 10-15% contingency.
- Allow 6-10 weeks for design/consent in normal conditions; the build itself is often 8-14 weeks.
- Value uplift tends to track added usable floor area and bedroom count; not all floor under low eaves counts as “habitable.”
What it costs and why in 2025 (NZ context)
New Zealand is great for loft conversions because so many homes carry unrealised roof space. Costs, though, are not one-size-fits-all. If you start with a steep roof and a decent ridge height, you’ll spend less. If you have a low-pitch truss roof and need dormers or a roof lift, your budget jumps.
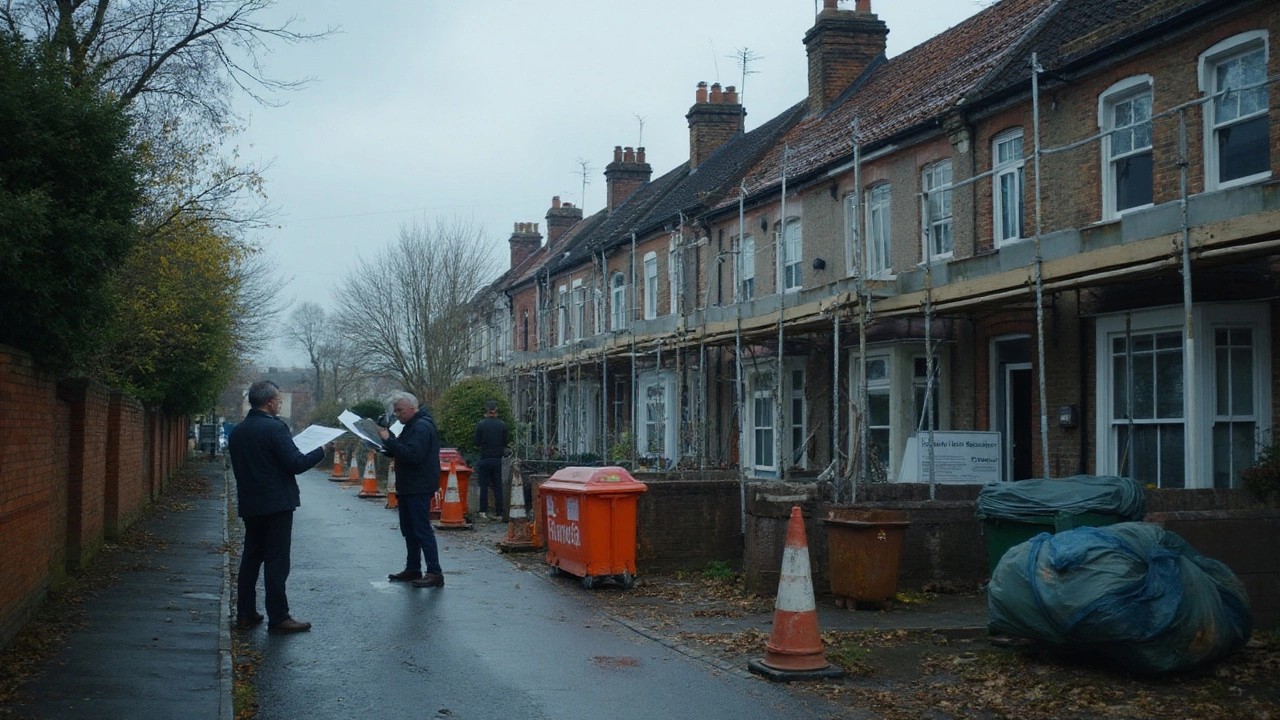
Here’s a simple rule: your budget follows the amount of structural change needed to reach safe head height and daylight standards, then the complexity of fit-out (stairs, bathroom, insulation, windows, finishes). In Auckland, scaffolding and access can also swing costs by tens of thousands if you’re on a tight site or a steep section.
Typical ranges I see across Auckland and larger NZ cities in 2025:
- Roof‑light only (no dormer, no bathroom): NZ$50,000-$90,000
- Dormer conversion (one or two dormers, stair, insulated, finished room): NZ$120,000-$220,000
- Dormer + ensuite: NZ$140,000-$260,000
- Full roof lift or mansard to create proper head height: NZ$200,000-$400,000+
Per‑m² numbers help sanity-check your plan: NZ$2,800-$5,500 per m² for typical conversions, higher if structure or access is complex. Add GST (15%) if you’re comparing to pre‑GST figures.
What’s inside those numbers? This breakdown covers the usual suspects. Your mix will vary, but the pattern holds.
| Line item | What it covers | Typical range (NZ$) | Notes |
|---|---|---|---|
| Design & engineering | Concepts, drawings, structural calcs | 8,000-25,000 | More if complex roof or heritage overlays |
| Council fees | Building consent, inspections | 3,000-9,000 | Resource consent only if triggered by planning rules |
| Scaffolding & access | Edge protection, wrap, site access | 8,000-30,000+ | Steep sites and wraps push this up |
| Structure | New floor joists, beams, steel, bracing | 20,000-80,000+ | Truss modification or roof lift costs most |
| Dormers/roof works | Dormer framing, cladding, roof tie-ins | 20,000-100,000+ | Each dormer can be a project of its own |
| Stairs | Framing, balustrades, finishing | 15,000-30,000 | Space-hungry; code rules for rise/run and headroom |
| Insulation & lining | Roof/wall insulation, GIB, stopping | 8,000-25,000 | Higher R-values often needed under H1 |
| Windows & roof lights | Skylights, dormer windows, flashings | 6,000-25,000 | Custom flashing and access drive cost |
| Electrical & lighting | Wiring, downlights, smoke alarms | 8,000-15,000 | Allow for extra power points and data |
| Plumbing (if ensuite) | Waste/vent, hot/cold, fixtures | 15,000-35,000 | Long pipe runs and pumps add cost |
| Finishes | Flooring, paint, trim, storage | 8,000-25,000 | Built-in joinery is worth the spend in eaves |
| Contingency | Unseen framing, rot, services | 10-15% of build | Older villas and bungalows: lean toward 15% |
A quick budget formula you can use today:
- Base build = new usable floor area (m²) × per‑m² rate (choose NZ$3,200 for simple to NZ$5,500 for complex)
- + Design/engineering/council = 10-15% of base build
- + Stairs = NZ$15k-30k
- + Plumbing pack (if bathroom) = NZ$15k-35k
- + Windows/roof lights = NZ$6k-25k
- + Contingency = 10-15%
Example: 28 m² usable area dormer conversion with an ensuite in Auckland. Mid‑range per‑m² NZ$4,300 → Base NZ$120,400. Soft costs at 12% → NZ$14,448. Stairs NZ$22,000. Plumbing NZ$22,000. Windows NZ$12,000. Subtotal NZ$190,848. Contingency 12% → NZ$22,902. Approx. NZ$214,000 incl. GST-a very normal number right now.
On consent timing, MBIE’s Building Act guidance is clear about starting work:
“If your building work requires a building consent, you must not start work until the consent is granted.” - MBIE Building Performance
Most habitable loft conversions need consent because you’re altering structure, fire safety, and insulation. Resource consent is only triggered if you hit planning rules-think roof height, daylight planes, heritage overlays, or windows facing neighbours.
One thing that catches people out in 2025: the energy efficiency rules stepped up in recent years. Even for alterations, you’ll be asked to upgrade insulation to the extent that’s reasonably practicable when you open things up. That can mean thicker insulation, rigid boards, or insulated plasterboard to hit target R‑values-especially at the roof.
If you’re comparing to a ground-floor extension, the per‑m² construction cost can be similar. Where lofts often win is less foundation and sitework, and better use of your footprint. Where extensions can win is easier plumbing and fewer structural unknowns.

Plan it right: steps, rules of thumb, and pitfalls
If you want a sharp number and fewer surprises, follow a simple playbook. It saves time and money.
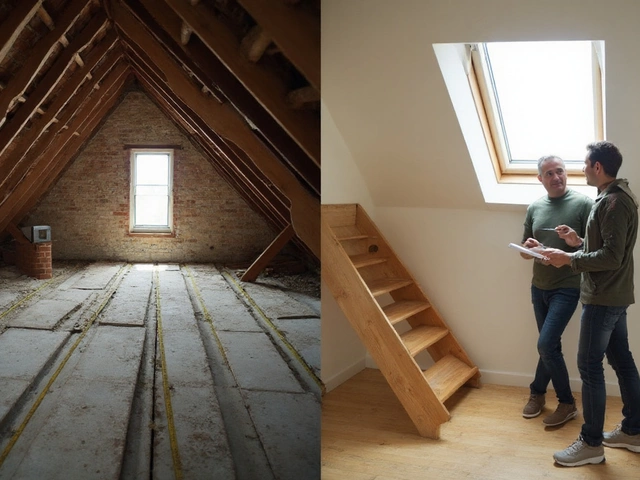
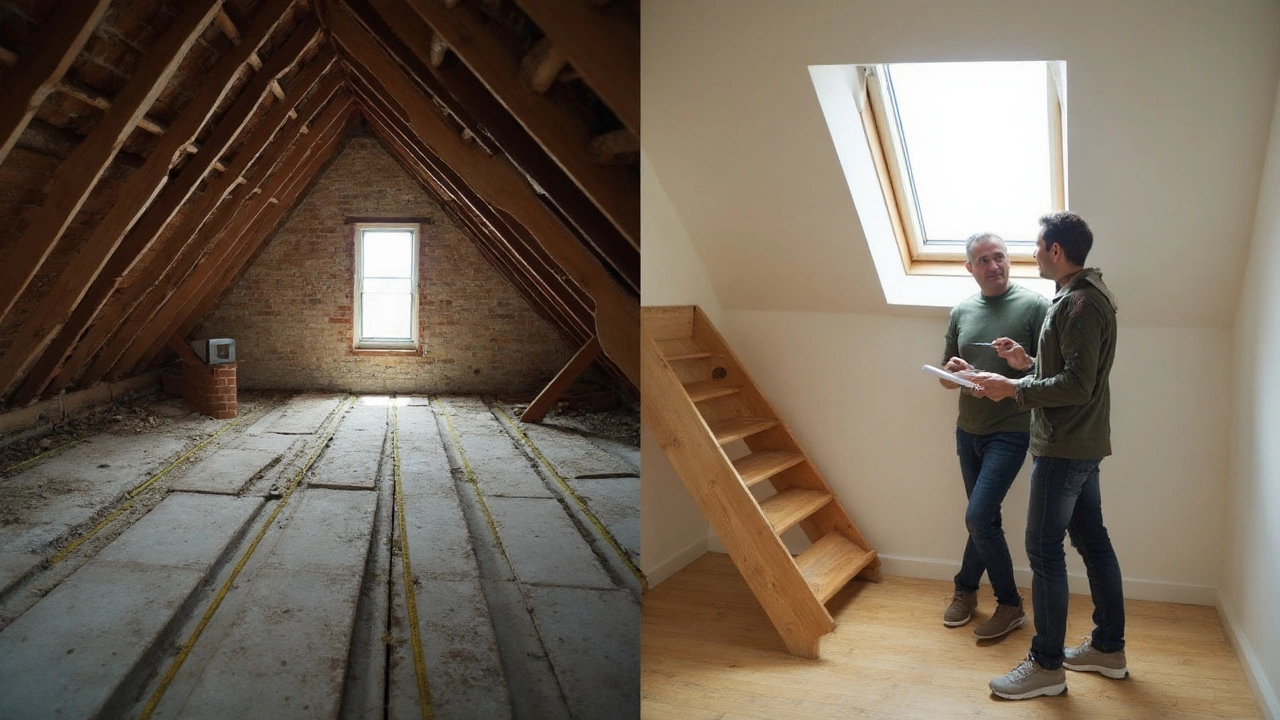
- Check feasibility fast. Pull out a tape and a level. Measure existing ridge height and the depth of usable floor where you can hit about 2.1-2.3 m finished head height. You’ll lose some height to new floor build‑up (often 120-200 mm for joists and acoustic layers) and to plasterboard/insulation at the roof. If your remaining head height is marginal across most of the space, plan for dormers or accept a smaller usable area.
- Look at the roof structure. Is it a traditional rafter-and-purlin roof, or modern trusses? Rafters are simpler to strengthen; trusses can be altered, but only under an engineer’s design and usually with more steel and labour.
- Think stairs early. Stairs need space on both levels. NZ Code rules for stair rise/run and handrails are strict, and you need about 2.0 m headroom over the stair. If you have to steal space from a bedroom below, draw that now and decide if it still works.
- Decide bathroom or not. Adding an ensuite is great for resale, but it adds cost and complexity. If the nearest stack is far, allow more for waste/vent and pumps. If you skip the bathroom, you can still rough‑in capped services for future buyers.
- Get a concept and ballpark cost. A designer sketches options and an engineer gives a structural concept. A builder or QS can price the concept to give you a reliable range. Spend a little on this and you’ll save a lot later.
- Consent properly. Your designer lodges drawings and calculations. Council requests more info, you respond, consent is granted, then you build. Plan for 4-8 weeks depending on council workload and complexity.
- Sequence the build. Typical sequence: scaffolding → roof openings and weatherproofing → structure (joists, steels) → dormers/windows → stairs → services rough‑in → insulation/linings → waterproofing/tiling if ensuite → finishes → final Electrical/Plumbing sign‑offs → Council Code Compliance Certificate (CCC).
Rules of thumb that keep budgets honest:
- Pick the simplest roof changes that deliver head height. One big dormer usually beats three small ones.
- Prefer rectangular rooms with storage built into eaves. It’s cheaper to line and easier to furnish.
- Don’t skimp on insulation and air‑tightness. Hot roofs cost you every winter and summer.
- Push for factory‑flashed skylights and standard window sizes to cut custom flashing costs.
- Stage any re‑roofing with the conversion. Combining scaffolding and wrap saves thousands.
Common pitfalls I see around Auckland:
- Underestimating services runs. Getting waste and vent to the stack in old villas can be a maze. Budget extra time and access holes.
- Assuming all roof area is “habitable.” Low eaves with less than about 1.5-1.8 m headroom aren’t usable in a practical sense, even if lined. Build in cupboards there and count only the real walkable floor.
- Forgetting smoke alarms and egress. You’ll need compliant smoke detection and safe escape. That means proper window sizes or a protected path, and it’s checked at consent.
- Not planning storage. Eaves are storage gold. Get your joiner to draw custom cupboards and drawers-cheaper now than after move‑in.
- Late stair decisions. The stair position cascades into everything-structure, layout, and downstairs rooms. Lock it early.
On fire and access: expect your designer and council to focus on safe escape and smoke detection. Many projects use a protected stair path and interlinked smoke alarms throughout. If your layout is unusual, your designer will propose an accepted solution or an engineered alternative. Keep it simple and it stays affordable.
Real-world budgets, choices, and FAQs
Here are three realistic examples to map your own plan against.
- Case A: Roof‑light room, no bathroom, simple rafter roof. 22 m² of usable floor. Two large skylights, new stair over existing hall, no dormers. Mid‑range finishes. Expect NZ$70k-$95k in Auckland. Main risks: finding the stair space and reinforcing joists.
- Case B: One big rear dormer + ensuite in a 1920s bungalow. 28-32 m² usable. New floor structure with a couple of steels, one full‑width dormer to the rear for head height, tiled shower. Good insulation, four roof windows. Expect NZ$150k-$230k. Main risks: weatherproofing the dormer and aligning bathroom stacks.
- Case C: Low‑pitch truss roof needing a roof lift. 35-45 m² usable. Raise the ridge with engineered framing, new roofing to most of the house, two dormers, full stair rebuild, ensuite and a wardrobe room. Expect NZ$260k-$420k+. Main risks: program length, scaffold/wrap costs, and roof tie‑ins.
Not sure which route to take? Use this quick decision path:
- If your finished head height across most of the planned room will be under roughly 2.1 m → add a dormer or rethink.
- If you have modern trusses and a shallow pitch → price a dormer; if head height is still poor, get an engineer to test a partial roof lift.
- If the stair can’t fit without wrecking a key downstairs room → consider a smaller loft or a ground-level extension instead.
- If you plan to sell soon → a dormer + ensuite is usually the sweet spot for resale.
Quick checklist to keep the budget on track:
- Feasibility sketch with measured head heights
- Early structural concept from an engineer
- Stair location locked before detailed design
- Insulation and skylight specs set early (avoid redesign)
- Bundled scaffolding with any re‑roofing
- Two comparable quotes with the same scope and PC Sums
- 10-15% contingency ring‑fenced
Answers to the questions I get the most:
- Is a loft conversion cheaper than an extension? Often, yes, if you avoid major structural changes and don’t need a roof lift. If you need a full lift or complex dormers, costs converge with a ground extension.
- How long will it take? Design and consent 6-10 weeks in normal conditions. Build 8-14 weeks depending on complexity. Add buffer for weather and council inspection bookings.
- Do I need a building consent? Almost certainly, because you’re changing structure and fire/insulation. Your designer will confirm and handle it.
- What about resource consent? Only if you breach planning rules (height, daylight planes, heritage, overlooking). Your designer checks your District Plan and flags it early.
- Will the whole house need to be upgraded? Councils can ask for sensible upgrades that are “as near as reasonably practicable” when you open building elements-think insulation in the roof you’re lining, smoke alarms, and the stair. You won’t be forced to rebuild unrelated parts that aren’t touched.
- Do I need sprinklers? Typical single-dwelling lofts do not. Your designer will set a fire strategy that meets Code without sprinklers in most cases.
- What ceiling height should I aim for? Aim for 2.2-2.4 m in the main walk zone for comfort. Minimum headroom rules apply to stairs; habitable room comfort is your call and a resale factor.
- Can I live at home during the build? Usually, yes. Expect noise, dust, and temporary closures while the stair goes in and during linings. A good builder will seal off zones and plan loud works.
Cost control pro tips from site:
- Keep the roof geometry simple. Fewer planes, fewer leaks, lower cost.
- Standardise fixtures: pick a bathroom pack, stick to it, and lock it before ordering.
- Spend money where you touch and feel: stairs, insulation, and windows. Save on “invisible” over‑spec where it doesn’t return value.
- Push for a clear list of PC Sums and Provisional Sums in your contract so you can compare apples to apples.
If you’re after a number to plan around: a well‑executed dormer conversion with an ensuite in Auckland tends to settle around NZ$150k-$230k right now. Simpler roof‑light‑only rooms can be sub‑NZ$100k. Full roof lifts run past NZ$250k because you’re basically rebuilding the top of the house.
One last word on forecasts: materials and labour have steadied compared to the big spikes of recent years, but specialists (roofers, scaffolders, steel) are still busy. Lead times are real. Lock your spot with a builder only after consentable drawings and a detailed scope-your future self will thank you.
SEO note for clarity: if you’re searching for loft conversion cost in Auckland or across NZ, the ranges above reflect typical 2025 numbers including GST and realistic soft costs.
Next steps if you’re at different starting points:
- Low pitch, truss roof: Get an engineer’s view before falling in love with drawings. Price a single large rear dormer first; if head height is still short, cost a partial roof lift option.
- Character home with heritage overlay: Loop planning in early. Window placement and dormer scale may be limited. Expect more design hours and a longer consent path.
- Tight budget under NZ$120k: Aim for a roof‑light conversion without a bathroom, maximise storage in eaves, and reuse existing finishes where possible. Pre‑plan wiring for a future bathroom to keep value.
- Rental upgrade: Focus on durable finishes, compliant egress, acoustic layers under new floors, and low‑maintenance windows. An ensuite may not pay back if the area caps rents.
- Short timeline: Standardise everything: stair kit, factory‑flashed skylights, stock tiles and fixtures, and lock decisions by consent submission to avoid rework.
Troubleshooting common snags:
- Quote variance is huge. Check scope. Are dormers fully lined and insulated in all quotes? Are scaffolding, wrap, and contingencies included? Ask for a line‑by‑line reconciliation.
- Council asks for more information (RFI). Don’t panic. Your designer responds with extra structural details, fire notes, or product specs. Build this time into your program.
- Head height is coming up short on site. Options: lower the floor below locally (if structure allows), increase dormer size, or move the stair to reclaim headroom at the top step.
- Unexpected rot in rafters or ridge. Use your contingency. Replace affected members under engineer direction and keep detailed photos for CCC records.
- Noise to neighbours during roof works. Pre‑warn them about dates, especially for saws and nail guns. A bit of goodwill goes a long way with access and deliveries.
If you take nothing else from this guide, take this: pick the simplest structural path to legal, comfortable space; design your stair first; and protect your contingency. That’s how you land your loft within budget and on time.