3 4 5 Method: The Simple Trick for Perfectly Square Building Layouts
Few things cause headaches on a construction site like a building that doesn’t sit square. Ever noticed a doorway that never quite shuts or a wall that runs at a weird angle? Nine times out of ten, someone somewhere got lazy with layout. The secret to crisp, 90-degree corners isn’t expensive tech—it’s the humble 3 4 5 method. Grab a measuring tape, and you’re halfway there.
This method is pure genius in its simplicity. You just measure out three feet on one line, four feet on a line at a right angle, and if the diagonal between those marks measures five feet… you’ve nailed a perfect right angle. It’s based on the Pythagorean Theorem—so yeah, this is the one bit of high school math you’ll actually use on a job site.
Pros use it every day for laying out foundation corners, checking forms for concrete, or even just making sure that new break room in an office remodel doesn’t have a funhouse vibe. The best part? No fancy equipment needed—just a brain, a buddy, and a tape measure that isn’t stretched out from doubling as your truck tie-down.
- Why Squaring Corners Matters
- How the 3 4 5 Triangle Works
- Step-by-Step: Using the 3 4 5 Method
- Common Mistakes to Avoid
- Tips for Fast, Accurate Layouts
Why Squaring Corners Matters
Getting your building layout square isn’t just about looking professional—it makes or breaks the whole job. If corners aren’t exactly 90 degrees, you’ll feel the pain later. Doors that bind, drywall that won’t line up, tile jobs that go wonky—these are the headaches you’re signing up for if you skip proper squaring from the start.
In commercial construction, everything from steel beams to HVAC ducts depends on square corners. The bigger the project, the bigger the problems if things start off crooked. A foundation even a half-inch out of square can throw off every measurement that comes later, wasting time and money on fixes.
| What Goes Wrong | Typical Result |
|---|---|
| Foundation not square | Walls misaligned, framing nightmares |
| Rooms out of square | Flooring gaps, fit issues with windows/doors |
| Masonry corners off | Wavy brick lines, poor appearance |
Ever tried to fit factory-built cabinets into a kitchen that’s not square? Either the cabinets don’t line up, or you have to trim and shim forever. Even small jobs go south fast if you don’t start out square. Getting it right at layout saves rework, arguments, and cash—not to mention keeps your reputation solid.
If you want your project to be problem-free and stand the test of time, obsessing over square corners isn’t just nitpicking—it’s essential. That’s where the 3 4 5 method comes in as an easy, reliable way to lock in your layout from day one.
How the 3 4 5 Triangle Works
The magic behind the 3 4 5 method is all about making a triangle with sides measuring 3 units, 4 units, and 5 units—think feet, meters, inches, whatever works for your layout. This comes straight from the Pythagorean Theorem, which you probably saw in school: a2 + b2 = c2. With a triangle where sides are 3 and 4, you get 32 + 42 = 9 + 16 = 25, and the square root of 25 is 5. That means the angle between the 3 and 4 sides is a guaranteed 90 degrees.
Here’s why this matters: if your foundation corners aren’t at true right angles, every wall after that starts to twist out of line. Fixtures don’t fit, floors don’t line up—it’s a mess. That’s why pro crews still use this simple trick, no matter how high-tech their gear is.
"If your foundation is out by even half an inch on a big building, you’re going to feel it—doors won’t work right and drywall will crack. The 3 4 5 triangle keeps it square every time." – Roger Moore, Site Superintendent, Turner Construction
The cool thing is, the scale doesn’t matter. You could use 6, 8, and 10 feet on a warehouse or 1.5, 2, and 2.5 meters for a kitchen addition. As long as the ratio is 3:4:5, you're guaranteed a 90-degree corner.
- Easy to remember: 3, 4, 5 (no calculator required)
- Works with any units: feet, inches, meters, centimeters
- Scales up for large sites or shrinks down for tight spots
Some survey crews will even use colored marks on their tape measures and go with 9, 12, and 15 feet for big jobs—same result, just easier to see from far away.
| Triangle Side | Measurement (feet) |
|---|---|
| First side | 3 |
| Second side | 4 |
| Diagonal | 5 |
You don’t need fancy lasers unless you just want to spend the money. Three measurements, a few stakes, and your building footprint is as square as it gets. When you see pros double-checking strings and chalk lines, chances are they’re following the triangle rule from start to finish. Think of it as the construction world’s version of checking your shoelaces before you run—one small step, no disasters later on.

Step-by-Step: Using the 3 4 5 Method
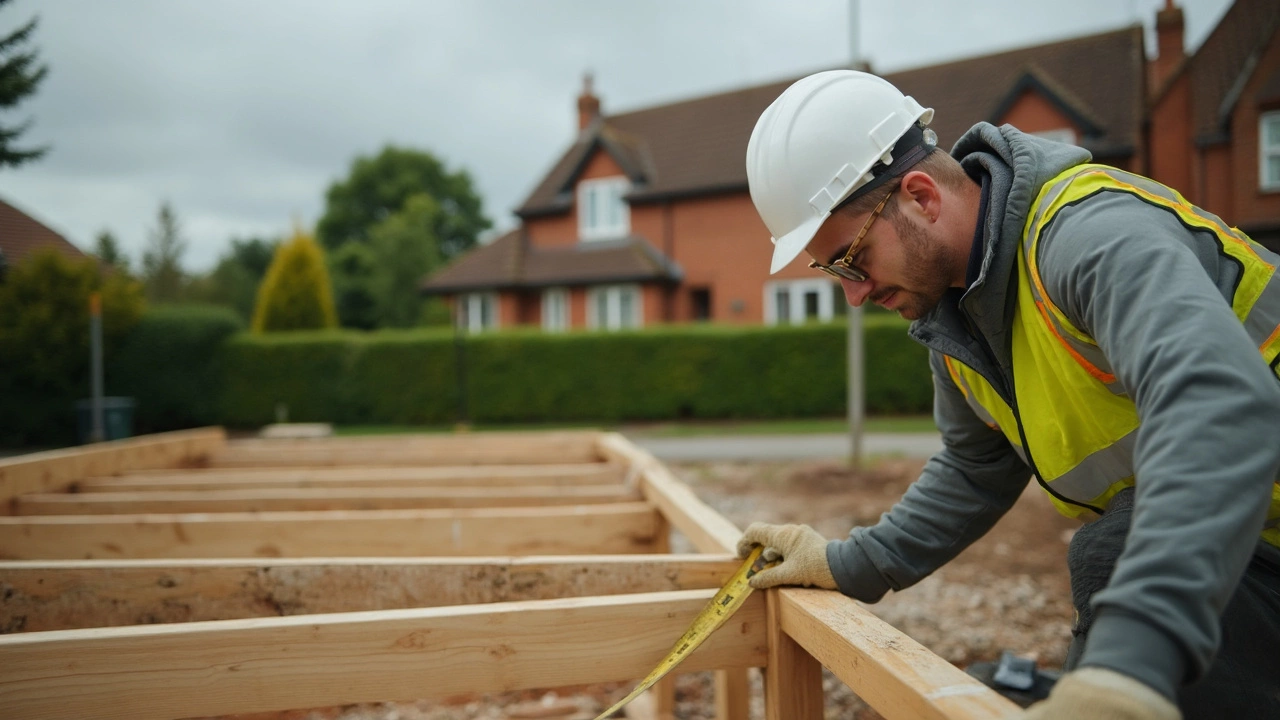
The beauty of the 3 4 5 method is how anyone can master it, whether you’re a project manager or it’s your first day holding a tape measure. Here’s how you do it, step by step, without fancy tools or high-tech gadgets:
- Mark the Baseline: Decide where you want your first wall or layout line. Hammer in a stake or set a mark at the starting point. Stretch a measuring tape (or string line) straight out for as long as you need—this is your baseline.
- Measure Three Units on Baseline: From your starting stake, measure exactly three feet (or meters, or anything—just stay consistent) along the baseline and make a mark. This defines the "3" side of your triangle.
- Set Up for the Right Angle: At the starting stake, use another tape to measure out four feet at roughly a 90-degree angle to your baseline. You don’t have to be perfect at this point. Mark this second point—this is your "4" side.
- Check the Diagonal: Now measure directly from your three-foot mark on the baseline to the four-foot mark off to the side. Slide the four-foot mark around until this diagonal distance hits exactly five feet. When it does, you’ve got a true right angle.
- Lock Everything In: Once those marks sit at exactly 3, 4, and 5 units, you know your corners are properly squared. Mark or stake your final position, then move to the next corner and repeat as needed.
Here’s a tip from years watching others fumble: always use the longest tape and largest triangle that fits your site. A 6, 8, 10 triangle or even 9, 12, 15 gives you more wiggle room for error—and the bigger your building, the bigger your triangle should be. If you’re laying out commercial-grade foundations, don’t mess with baby triangles unless you like headaches later.
Double-check each measurement. Even the best crews get sloppy. One wrong tug, and suddenly your whole building’s off by an inch or more. That inch gets ugly when the framing shows up.
Common Mistakes to Avoid
You’d be surprised how easy it is to mess up the 3 4 5 method if you’re not paying attention. Even old pros have been tripped up by small mistakes that turn into big problems once you start pouring concrete or framing walls. Here’s what trips people up the most—and how you can stay sharp.
- Bad tape measure habits: If your tape is stretched, kinked, or covered in cement, measurements can be off. Always double-check your tape before you start laying out those crucial marks.
- Sloppy marking: Pencil lines that are too thick or placed in the wrong spot can throw off your entire layout. Mark exactly where you measured—not an inch to the left or right.
- Measurement mix-ups: Switching between feet, inches, or meters without thinking can lead to the wrong triangle altogether. Stick to one system for every mark. For example, don’t lay out 3 feet, 4 inches, and 5 feet together—it won’t work.
- Diagonal tension: When measuring your diagonal (the key five), a loose tape that sags can throw things off. Pull the tape tight and have someone hold the end steady.
- Ignoring ground conditions: Uneven ground or bumps can mess up a straight line. Lay out on the flattest spot you can, or compensate for the slope if you don’t have a choice.
I’ve seen projects go totally sideways because folks tried to “eyeball” the triangle, thinking a little variance won’t matter. Check out these numbers—it’s easy to see how small mistakes add up fast:
| Measurement Error | Off-Square Impact on a 40 ft Wall |
|---|---|
| 1/4 inch | 2.1 inches |
| 1/2 inch | 4.2 inches |
| 1 inch | 8.4 inches |
Even a tiny flub at the layout stage gets ugly when you scale it up to a commercial building. Always measure twice—heck, get someone else to check for you if you’re tired or rushing. It’s way easier to fix a layout mistake with string than with jackhammers later on.

Tips for Fast, Accurate Layouts
If you want sharp corners and hassle-free builds, nailing the basics of layout is everything. The 3 4 5 method might be old-school, but it’s the fastest way to get a square start on your project—if you’re smart about how you use it.
- Use longer measurements for bigger jobs: The method scales up, so try 6-8-10 or even 9-12-15 if you’re working on a big concrete slab or long wall. Larger triangles let you be more accurate since human error gets magnified when the lines are short.
- Always double-check the diagonal: Even when you think you’ve set the corners right, measure the diagonal twice. On commercial sites, 1/8 inch off can turn into an expensive fix later.
- Mark clearly and stake tight strings: Don’t trust a quick scratch in the dirt. Use chalk, spray paint, or nails and stakes. Then pull your layout strings tight—they shouldn’t sag or wiggle. Sagging lines can throw everything off.
- Grab a friend: Trying to stretch a tape, hold a stake, and mark a spot solo is a recipe for mistakes. Two sets of hands are quicker and catch more errors.
- Lock in measurements and don’t eyeball: Always use a real tape measure, not just your best guess. Even experienced builders get burned when they try to “eyeball” square.
A surprising fact: according to data from the American Concrete Institute, nearly 65% of job site layout errors are traced back to poor squaring methods or lack of diagonal checks. Using the 3 4 5 triangle as your gold standard literally cuts these mistakes in half.
| Project Size | Recommended Triangle | Max Error with Careful Layout |
|---|---|---|
| Sheds, small pads | 3-4-5 | 1/8 inch |
| Home foundations | 6-8-10 | 1/4 inch |
| Commercial slabs | 9-12-15 | 1/4 inch or less |
Don’t be afraid to go bigger if you have space—the more you scale up those numbers, the less tiny measuring slips matter. It’s all about stacking the deck in your favor so every wall, door, and window lines up just right.